


For those who have always wondered how my quilts are drafted, this is for you.
Drafting the construction lines is what I call the puzzle. This will be the blueprint for how each of the fabric pieces will be sewn together. Since I am stitching enclosed seams - not layering raw edges - this is where I have to effectively envision nearly every seam in advance...and in what order they'll be assembled.
An operative word in that last sentence is 'nearly'. Art is an inspired thing; keeping your mind open to inspiration is the key to being an artist (musician, physicist, etc.). Many times my favorite results are those I had not foreseen - and which I may have struggled with accepting. Successful artistic accidents are my most joyful moments. With that understanding, I don't consider the drafted layout sacrosanct.
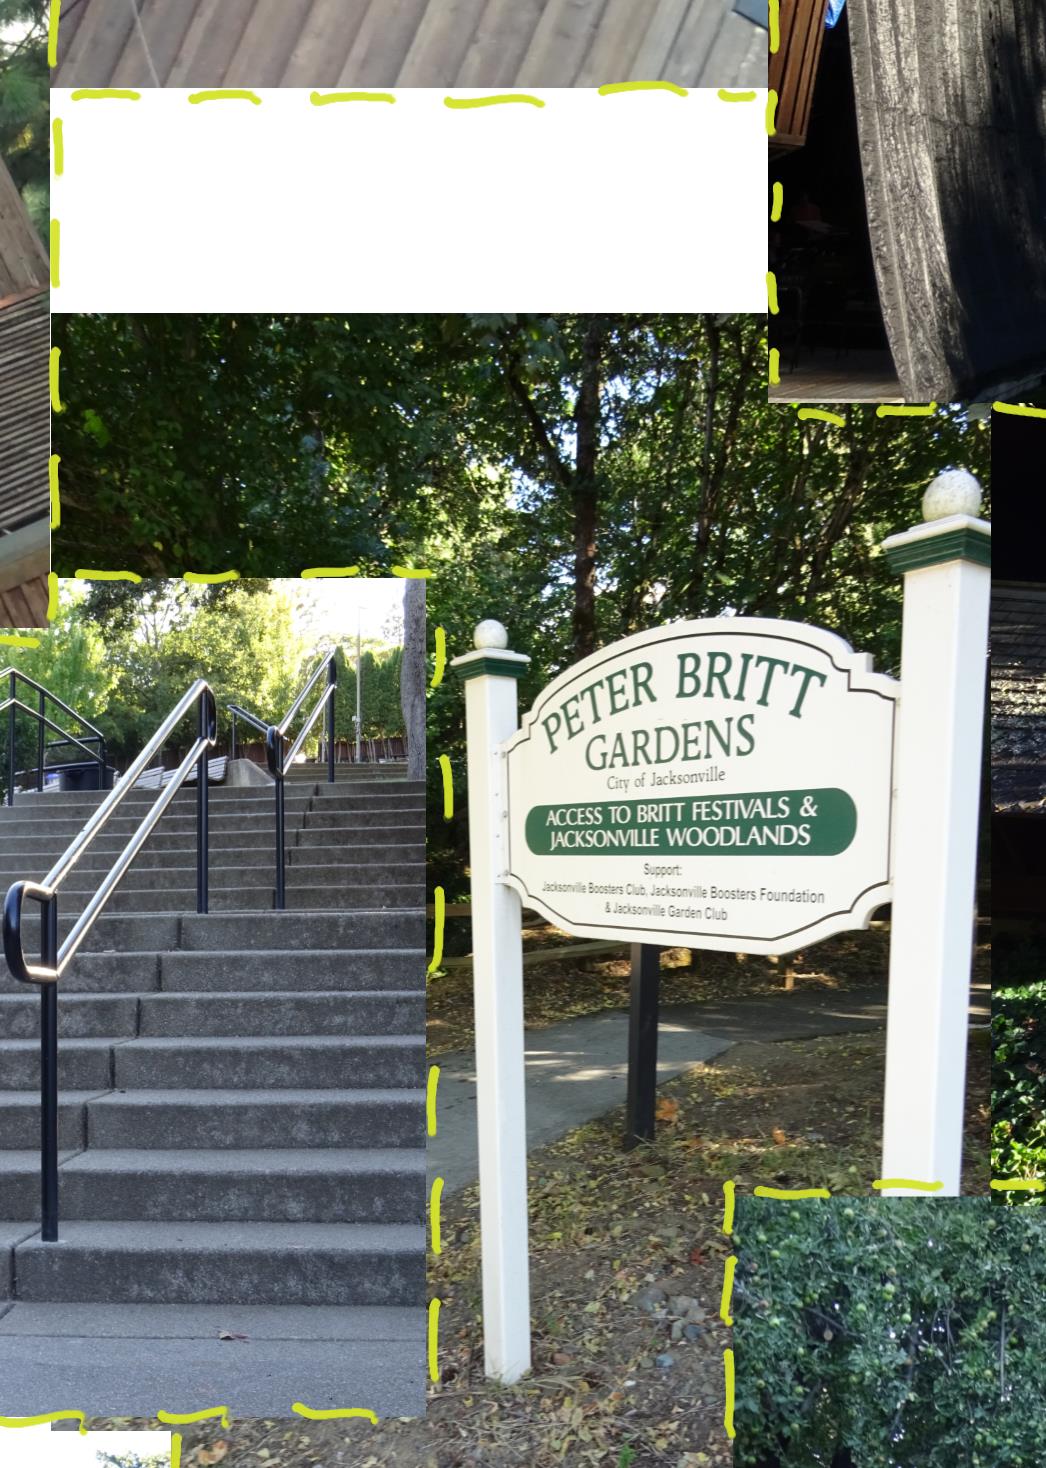
For illustrative purposes, here is a section of the 'alt-quilt' to show you how the photos have been layered. This segment contains pieces from 7 unique photos. (I've outlined them with yellow dashes to help identify)
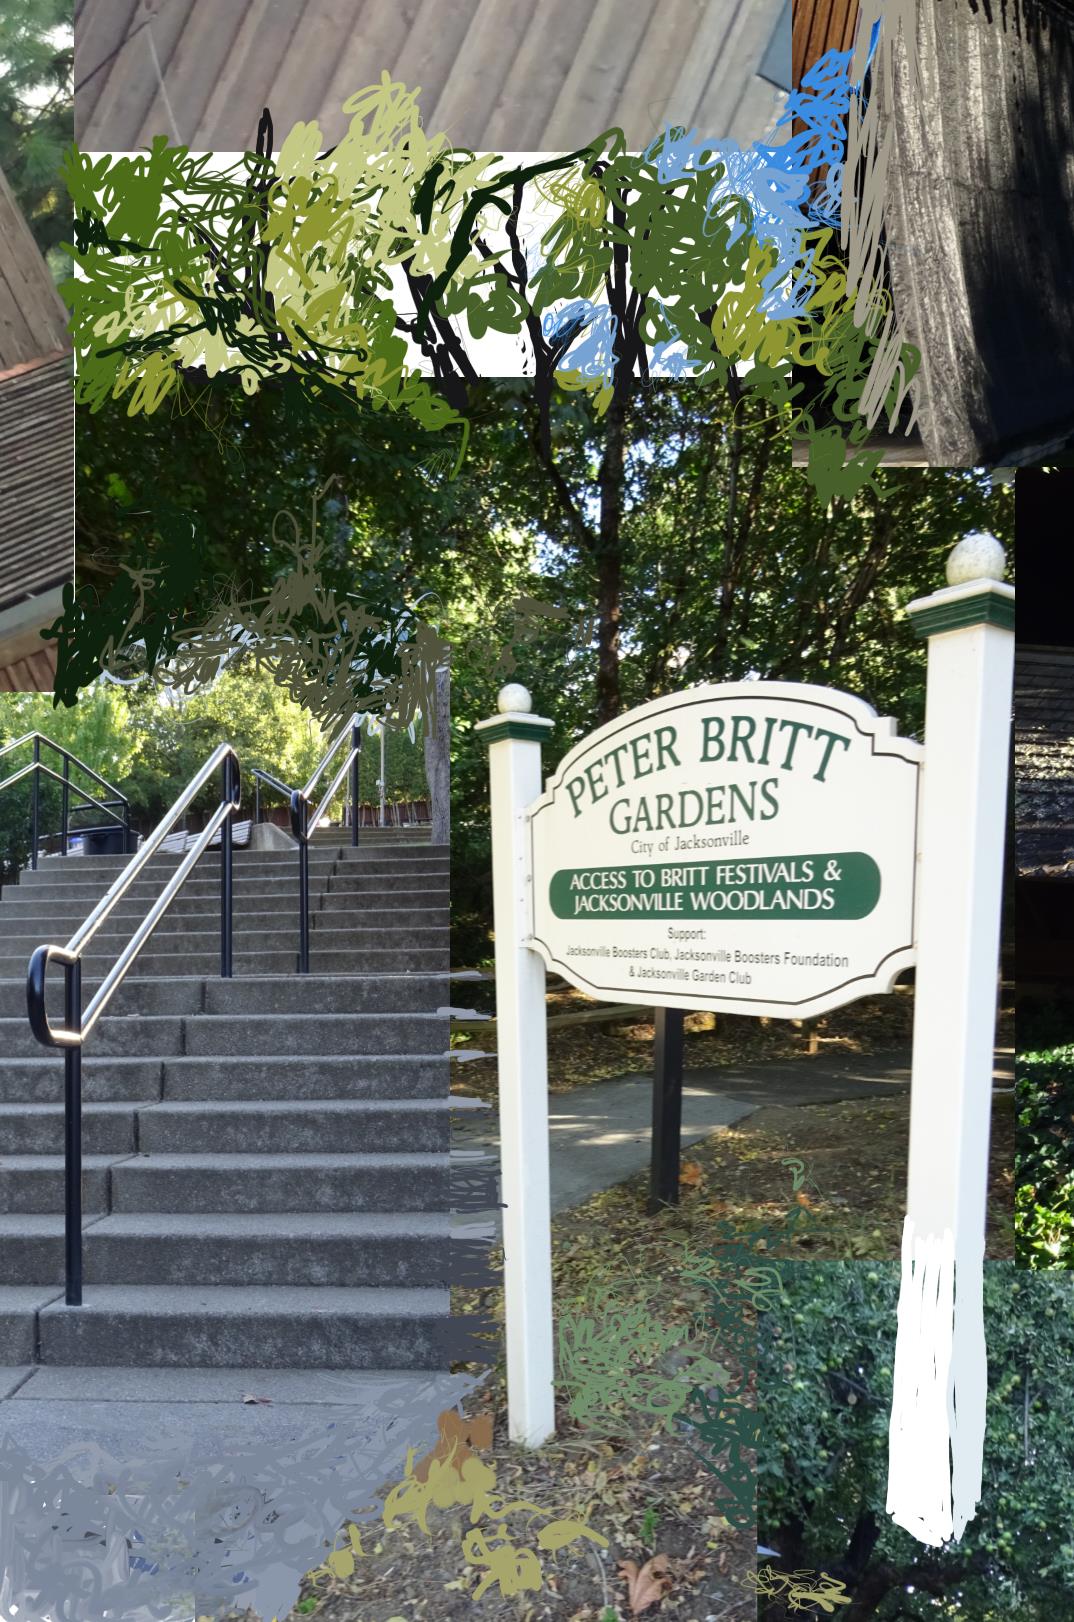
Obviously there is a significant white space where no photo was used. This is where I will envision a scene - or just filler - that will connect the elements. Prior to this project, I would generally just draft them in while I'm tracing the elements and building the puzzle. On occasion I've left an area blank until I'm already at the sewing machine. I may need to reflect on it longer, or just want to see how things start to grow.
But I decided that this blog would be best served by making those adjustments digitally so I can share them easily. I was able to open my design layout in Autodesk's Sketchbook Pro and using my touchscreen tablet, I drew onscreen elements I normally would have drawn with pens and pencils. I won't knock trying this new technology. It does not feel as intuitive nor tactile, but for these sketching purposes I found this tool superior for experimenting. I was able to save various options to evaluate and compare without losing any work. Ultimately though, the ability to undo/redo is generally my favorite feature.
Here is the alt-quilt segment with digital sketching
I was able to print the actual quilt layout from the program, taping together the 12 pieces of 8 1/2" x 11" paper. This becomes the background from which the puzzle is traced - the next step.
My Tools:
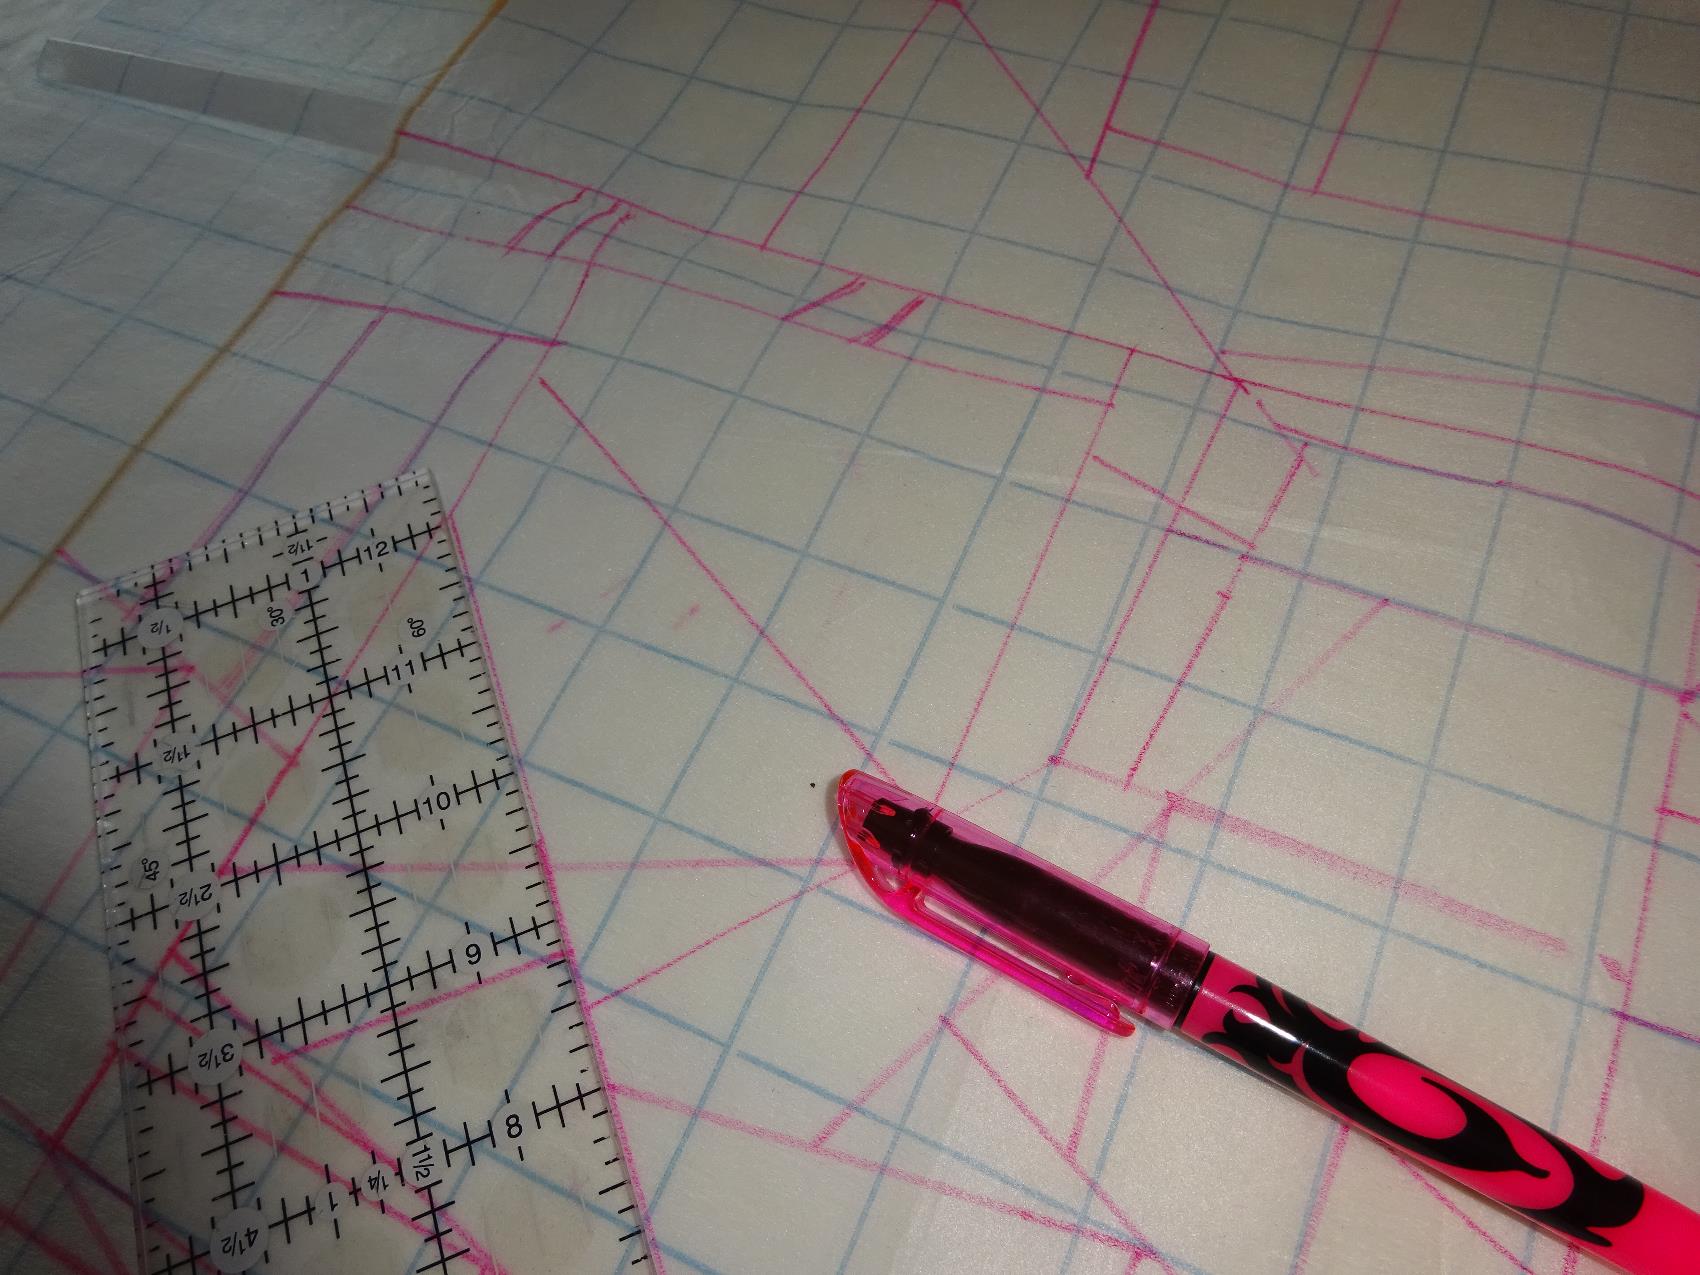
I trace the puzzle onto Tru-Grid pattern tracing material. This will be my physical pattern during construction. I've used Tru-Grid for years to trace garment patterns since they generally have multiple sizes included and I'll be able to use them again, even if my size doesn't stay the same (like...reality).
Most people assume I use freezer paper. I don't. Call it a tactile thing but I much prefer folding and manipulating fabric. That's why I'm a textile artist.
If you're going to try this, save your eyes and use a lightbox of some sort. I used to have a huge four florescent bulb box but I've since upgraded to a thin LED light pad which stays cooler and has more even light. The bonus being environmental bennies as well.
Many of us know that the search for the perfect marking tool can be an obsession. Let me state flatly that there is not any *just one* for every fabric and need; stop driving yourself crazy. I have used/tried many different things over the years with the Tru-Grid. They have all left me wonting. However - at this juncture - I believe I have found my grail.
I needed to find something that would show up better for the photos which led me to explore some newer options. What I decided to try - and which I now fully endorse - is the Frixion Highlighter pen. The highlighter style of ink means there is less drag on the Tru-Grid fiber than the traditional pen style. The other half of the marker search - and in some cases most important - is its easy removal. With the Frixion ink formula, any unwanted mark is easily removed with the touch of a mini-iron. This is much quicker and less tragic than trying to erase on the interfacing-like material. I have no reason to consider long-term results of the marking removal so can't speak to that. It is perfect - for this application,
Your favorite clear quilting ruler will be fine. I use the Creative Grid brand because I like their markings and built in grippers. I chose the 2 1/2" x 12 1/2" size for the ease of manipulation. I also have a 3 1/2" x 24 1/2" for when I need to draw longer lengths.
Next time I'll discuss the drafting process and visualizing the construction flow.


